
With the release of Windows 8 Microsoft added the feature of taking screenshot by pressing Windows Key![]() + PrtScr button simultaneously. By pressing this the screen will be flashed for fraction of second and the image will be captured and saved to ThisPc=>Pictures=>Screenshots. Today I will show you how to change this location to location of your choice. You can use this method for Windows 8 also.
+ PrtScr button simultaneously. By pressing this the screen will be flashed for fraction of second and the image will be captured and saved to ThisPc=>Pictures=>Screenshots. Today I will show you how to change this location to location of your choice. You can use this method for Windows 8 also.
Steps To Change default Screenshots location in Windows 10
- First you need to go to the default location, i.e. ThisPC>Pictures
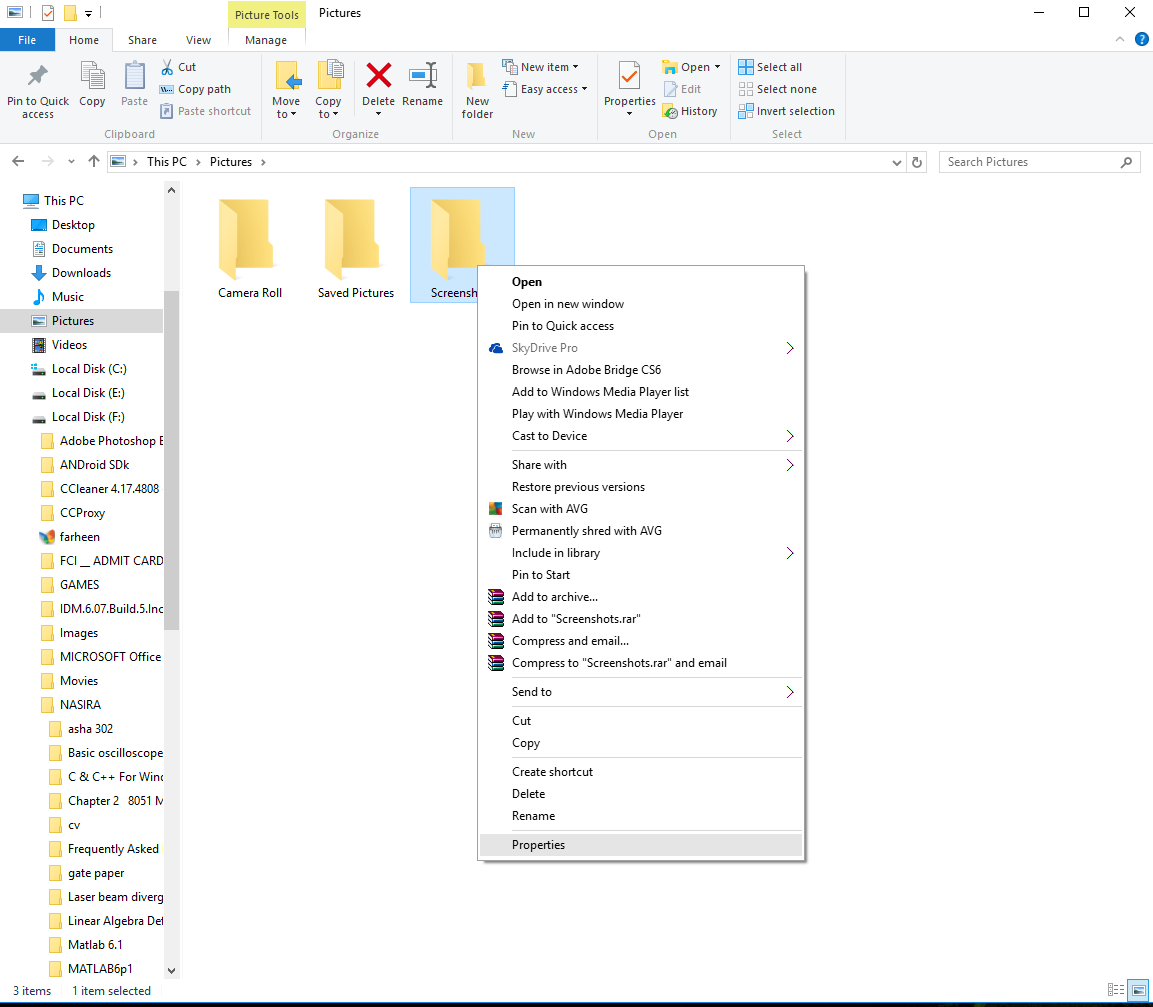
- You will see the folder named “Screenshots”.
- Right click on it and select “Properties”.
- Now click on the tab “Location” and click on “Move”.
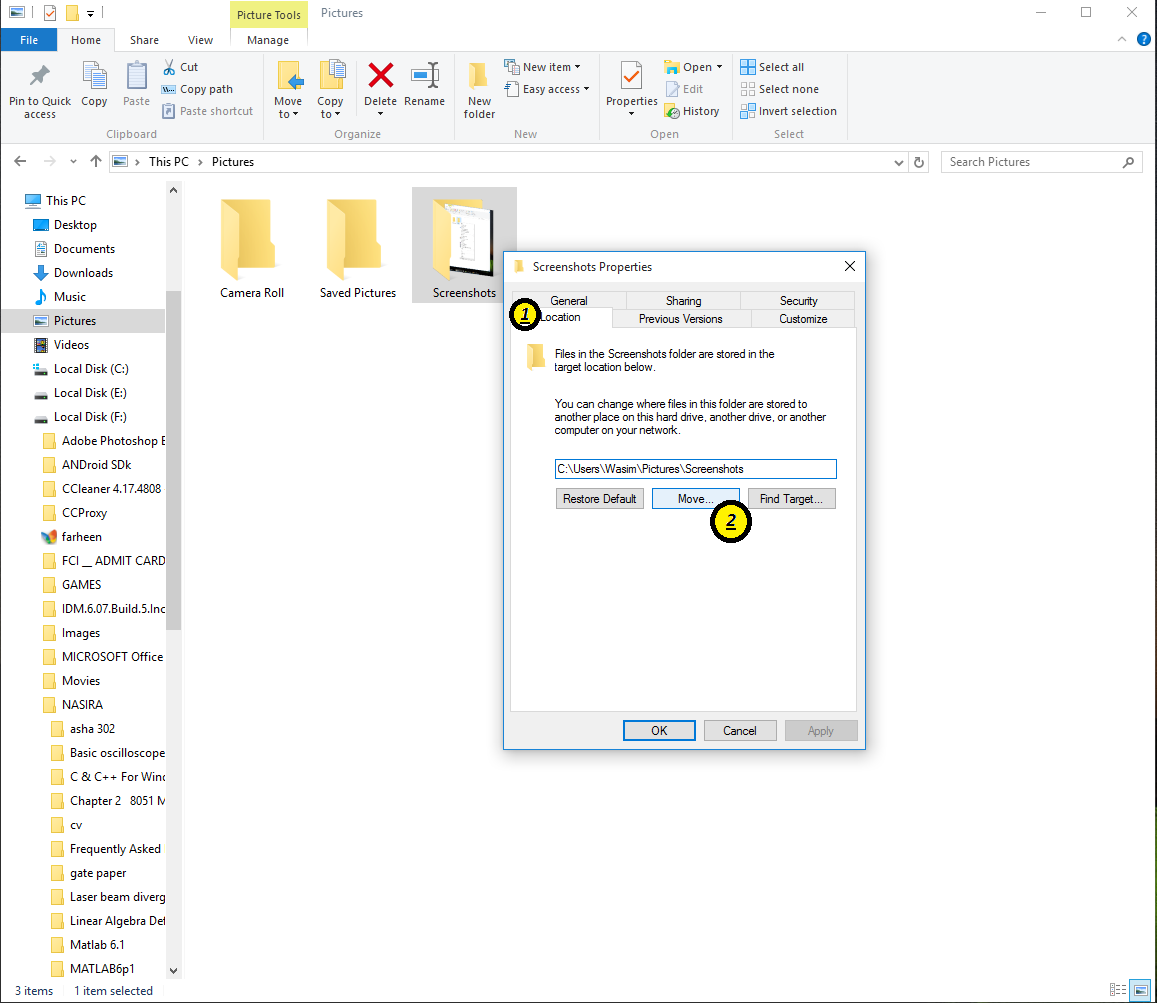
Change default Screenshots location in Windows 10 - Now select the folder where you want to save the screenshots. Then Click on “Apply” and then “OK”.
That’s it. You have changed default Screenshots location. 😀


Add Comment