OnePlus smartphones are easier to root and they do not even void your warranty. Exciting, right? This guide will help you to gain root access on your Nord. Once rooted, you will have superuser access to manage your device the way you like.
- Rooting may reduce the security of your phone.
- Some apps (such as banking related apps) will deny working on rooted devices.
- Wireless payment apps (such as Google Pay) may not offer wireless payments.
The easiest guide to root the OnePlus Nord!
Time needed: 10 minutes
Look nowhere else and follow the 6 steps below. You’ll have a rooted OnePlus Nord in less than 10 minutes!
- Unlock the bootloader (if not already done)
Unlocked bootloader is a must before you can root the OnePlus Nord. Please follow this dedicated post about bootloader unlock to learn the process of unlocking.
>> How to unlock the bootloader <<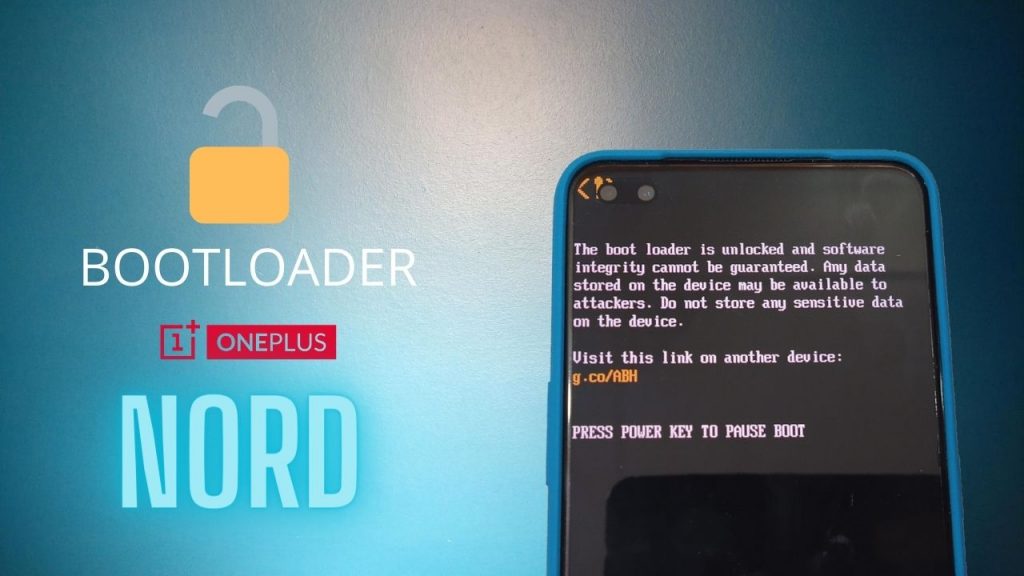
- Install Magisk Manager on your phone
Download and install the Magisk Manager app (apk) on your OnePlus Nord. You can download Magisk Manager from the official Github repo at the link below
>> Download Magisk Manager <<
After the download, install the app on your OnePlus phone. The app is not available directly via the Play Store for obvious reasons. - Download Magisk patched boot image on your computer
Now you need to download a compatible patched boot image. The patched images are pre-bundled with Magisk. So, you will get temporary root access when you boot them up.
Note: Download the patched image which matches the Android Security Patch installed on your phone. You can check the current security patch by going to Settings > About phone > Android version.
Example: If you have the patch dated July 1, 2020, then download the July 2020 boot image.
>> Download patched image for OnePlus Nord <<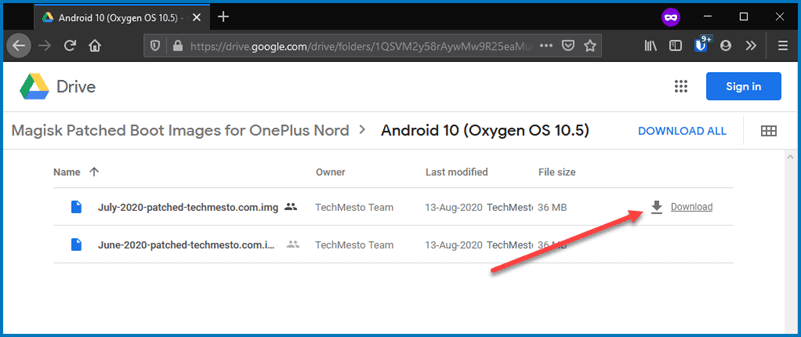
- Restart OnePlus Nord to fastboot/bootloader mode
Now, you need to boot the patched image on your OnePlus Nord. So, reboot the OnePlus Nord into fastboot mode by sending the following command in your command window/PowerShell/terminal.
adb reboot-bootloader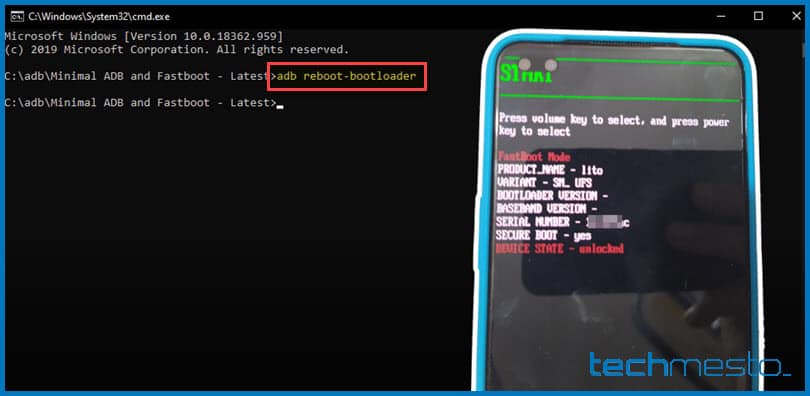
- Boot the Magisk patched boot image
Please use the following command to boot the patched image on your phone.
fastboot boot <file-name>
For example: fastboot boot July-2020-patched-techmesto.com.img
Make sure that the file is in the same folder as your platform-tools (adb and fastboot). If not, please use the full path of the file. I do that by dragging and dropping the file into the CMD window.
Info: WiFi may not work when you boot a patched image. Or the phone may reboot randomly. But don’t worry, it will start working normally when you do a full reboot later on. So, proceed without worries 🙂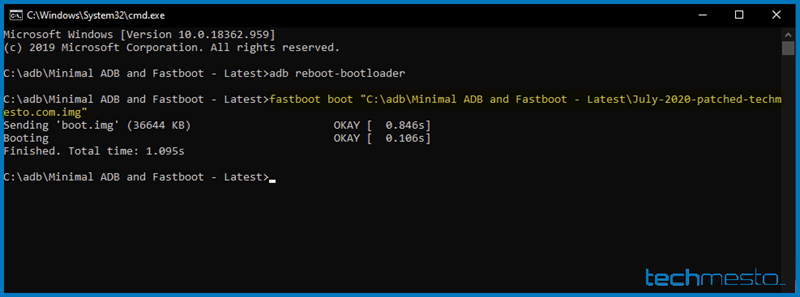
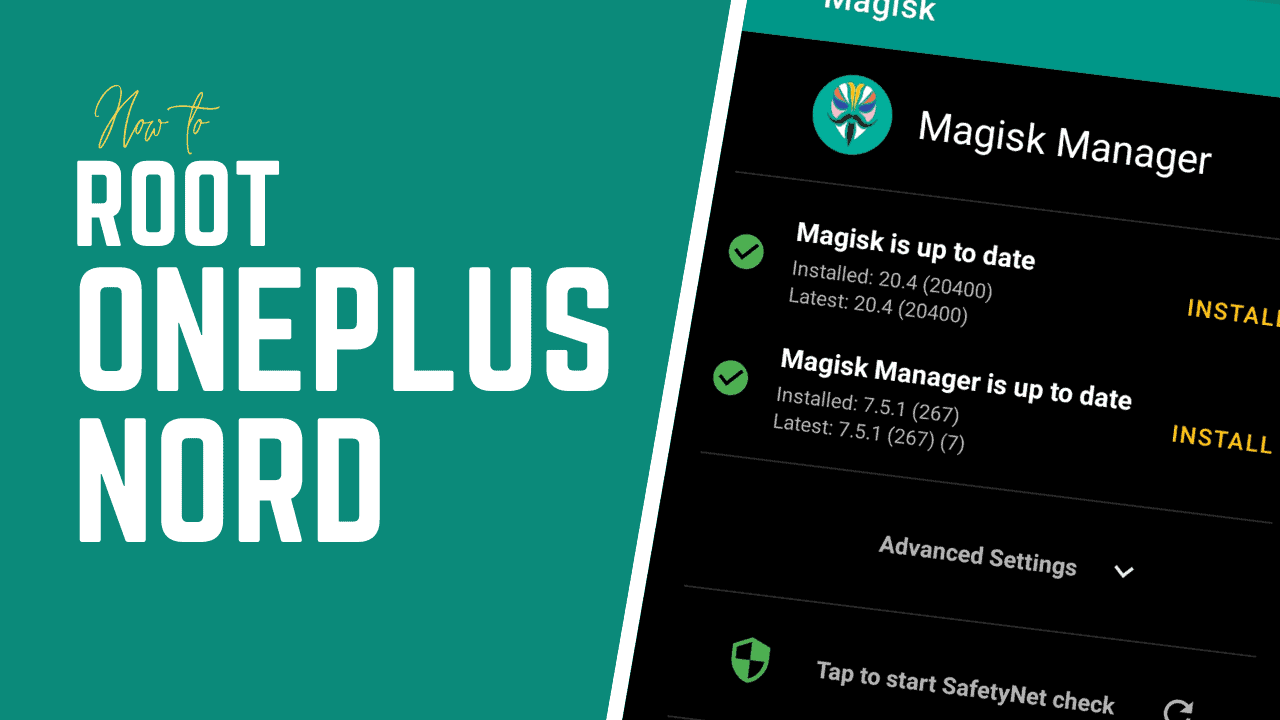
- Do “Direct Install” in Magisk Manager
Open the Magisk Manager app on your phone. You will notice the message saying “Magisk is up to date” or “Magisk update available”. If you do not see it, then please connect your phone to the internet using Mobile Data since WiFi will likely not work.
• Press on the Install button in front of Magisk (the first one).
• Tap on Install again for the prompt “Do you want to install Magisk”.
• Finally tap on Direct Install (Recommended).
Wait for Magisk Manager to download the Magsik.zip file and install it to your phone’s boot image. Reboot the phone when the flashing completes.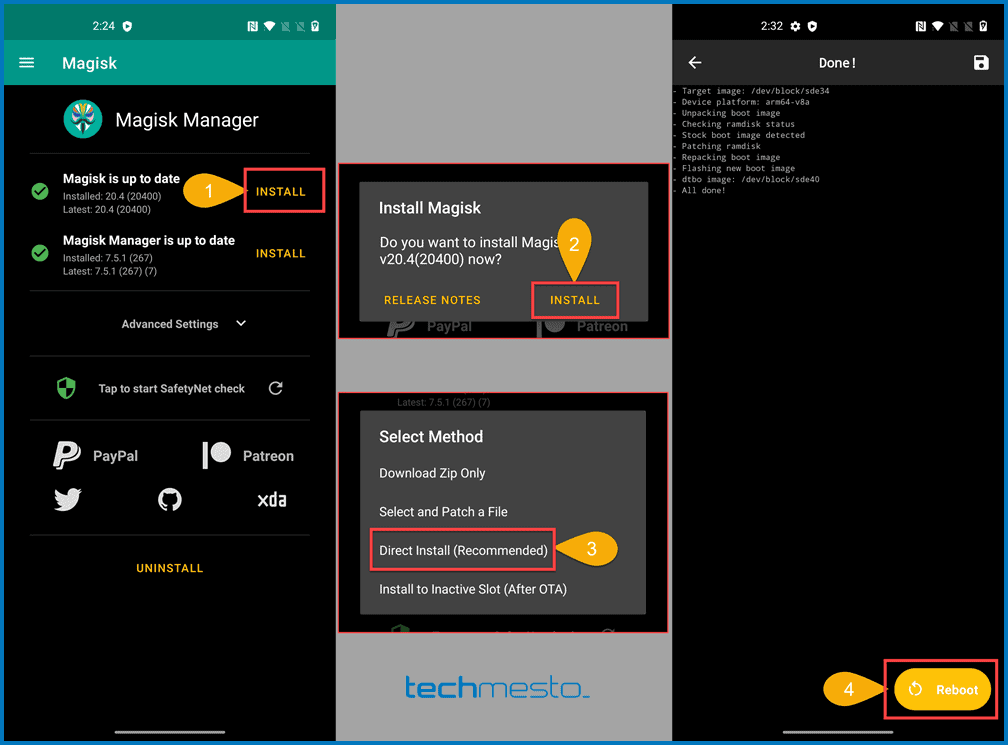
That’s it! You now have root access on your OnePlus Nord. You can start using your root apps, Magisk modules, or whatever you like.
Please do leave a comment below if this guide has helped you 😊