Microsoft introduced the Windows Store apps called ‘Metro Apps’ with Windows 8. Microsoft later decided to call them ‘Modern Apps’. And as of today, in Windows 10, the store apps are simply called as “Windows Apps”. Microsoft uses a hidden folder named WindowsApps to install these Metro/Modern apps. The folder is located within the Program Files folder in the system drive (C:\). Data for all of the Modern Apps are stored in the AppData folder under the user’s profile.
Installation and temporary data folders for Windows Apps
As with older programs, Windows uses different folders to store an app’s installation files and the data (such as sessions, in-app downloads; etc). Here are the details:
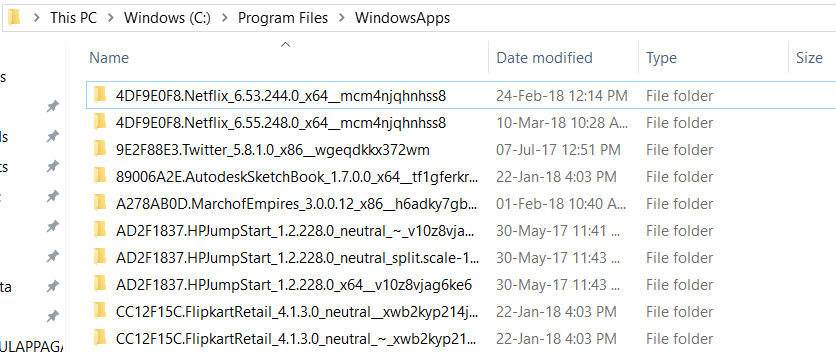
Installation folder – Apps are installed to the WindowsApps folder. You can find it at this location – C:\Program Files.
Temporary data folder (Isolated storage) – Modern apps save their data at the following location – C:\Users\<username>\AppData\Local\Packages.
Do note that both folders are hidden. They will not show under the list of folders unless you enable the display of hidden files in Windows 10. If you have enabled the hidden items, then the folders will appear in a lighter color, indicating that it is a hidden item.
You have found the WindowsApps folder. But you cannot access it yet. When you try to open, Windows will notify that you do not have permission to access the folder. You will click on Continue hoping that you would gain authority, but Windows will block your way by throwing the Permission Denied notice.
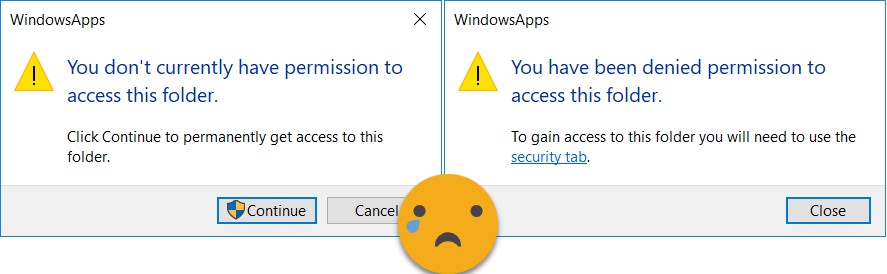
Why is it inaccessible? It is because you do not have permission to read or write to the folder. When you click continue, Windows tries to gain permission using an elevated (administrator) request, but since you’re not an owner of the folder, it gets denied again.
How to Access WindowsApps folder
You need to jump into the folder’s security settings and make yourself the owner in order to access it normally. Just follow the few steps below to get yourself in.
- Right-click on the WindowsApps folder and switch to the security tab.
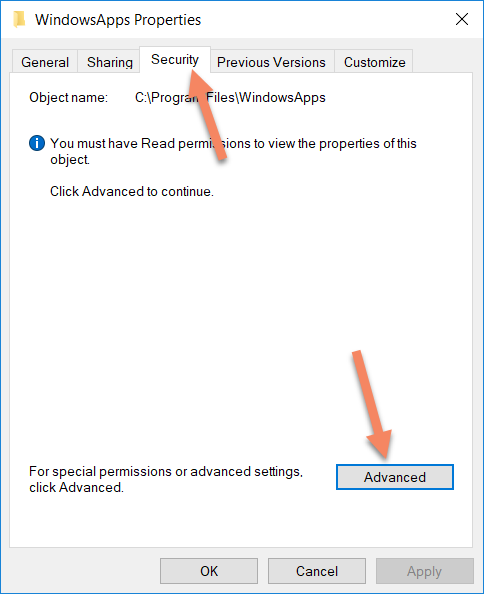
- Click on Continue and then click on Change in front of the owner.
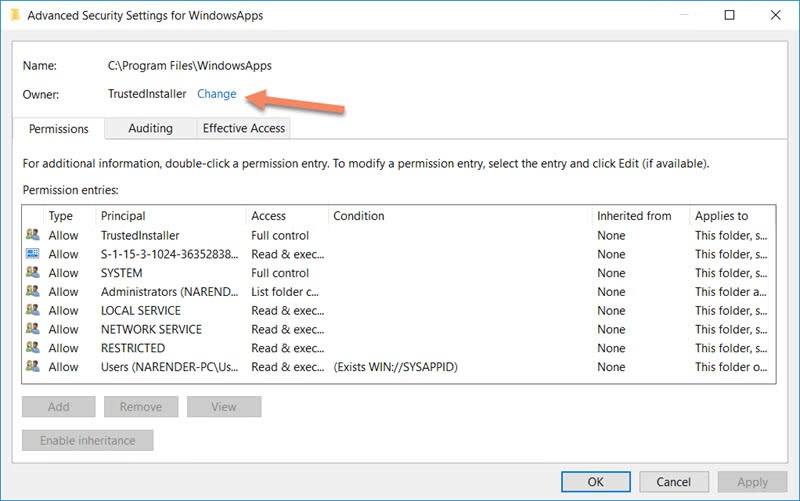
- Add yourself as the owner. If you are unsure about what to choose, click again on Advanced. Then click on Object Types and uncheck all other options except Users. Then click on Find now. Select your username from the list of search results and press OK to proceed.
- You will be added as the owner of the folder and you should now be able to access it. Simply go back and double click on the WindowsApps folder; then proceed by clicking on Continue on the permission prompt.
It will be a good idea to revert the change and make TrustedInstaller as the owner after you’re done accessing the folder. This will ensure that the app installs stay in good shape and remain free from viruses or malware.