Linux is free, open source and a great operating system, but it will not suit each one of us. So, if you installed Linux (Ubuntu, Linux Mint, Kali or any other) alongside Windows 8 just to check it out, here’s how to fully remove it from your system and boot Windows 8 normally without entering GRUB. If you don’t know what GRUB is, it is the default boot loader for majority of the Linux distros available today.
PS: This tutorial is only for a dual-boot setup in which you installed Linux in its own partition and GRUB was pushed to the MBR.
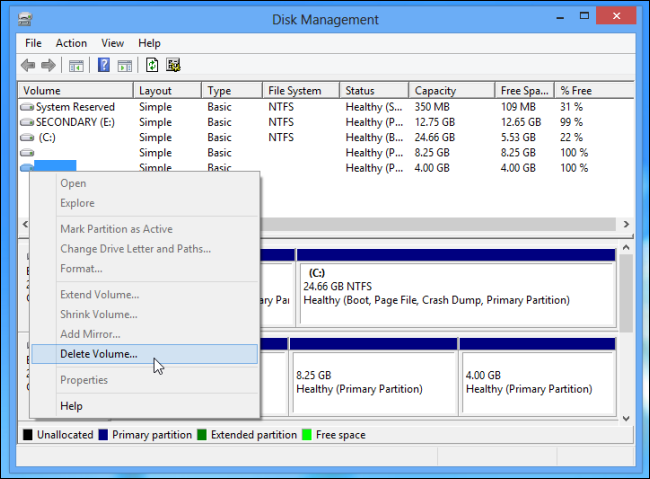
1. Removing the Linux Partitions
The first thing to do is to remove the partition(s) where Linux is installed. You may either choose to use those partitions as a separate drive or else extend the volume of your existing drives to use up the space generated by deleting the partitions.
- Boot into your Windows install and type diskmgmt.msc. Hit enter.
- Once here, identify your Linux partitions (be very careful and verify if you’re not sure). They should usually be in the ext4 or ext3 format.
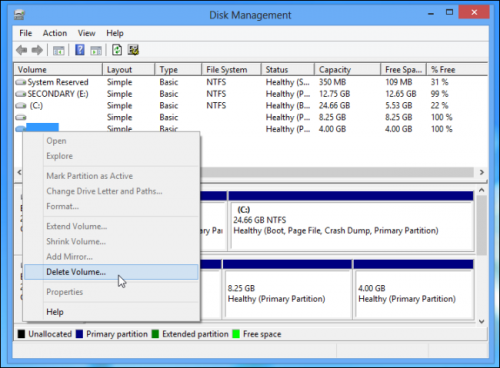
- Right click on the Linux partition and choose Delete volume. Repeat this step if you have more than one Linux partition.
- Depending on your requirement, you can use this free space hence generated to extend another partition or else create a new partition.
2. Removing GRUB and reverting to Windows boot loader
Now we need to remove Linux’s GRUB boot loader and revert to the standard loader of Windows 8 with no OS selection menu. Here’s how to do that:
- Creating a USB Recovery Media – Skip if you have a Windows 8 installation media
- Boot into your Windows 8 install. Open the start screen, type recoverydrive.exe and hit enter.

- Plug in your USB Drive and click on next.
- Choose the USB Drive from Available drives and click next.
- Click on create.
- Boot into your Windows 8 install. Open the start screen, type recoverydrive.exe and hit enter.
- Restart your PC with the Windows installation media or Recovery media selected as the first boot device.
- When Windows setup loads up, choose Repair your computer.
- Click on Troubleshoot on the Choose an option page.
- Choose Advanced Options and finally Command Prompt. Type the following command in the command prompt window:
bootrec.exe /fixmbr
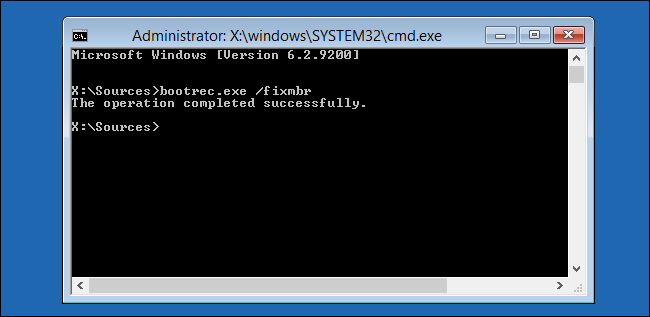
- After it is successfully done, restart your system and it should be good to go with Windows booting up normally 🙂