
The first question which comes in mind is that ” What is Briefcase feature and how does it works ?”
The answer to this question is this. Briefcase feature is used to synchronizes files and folders within itself with those in any other folder, even on a removable writable media or the network. The users with portable media or multiple computers are mostly using this feature. Using this feature is very simple, users only need to use Windows Explorer and then drag or copy their files into the Briefcase once. Any further changes to either the files on disk or those in the Briefcase are synchronized whenever the user right-clicks on the briefcase and selects Update All. If there are differences between the copies, the Briefcase shows a dialog box with an icon and a description indicating the action it will take when synchronizing; that is, whether it will replace the copy in the Briefcase with the external file or vice versa. The action the Briefcase will take is configurable by right clicking the icon. For example, users can skip synchronizing individual items by selecting the Skip action upon right clicking the icon. For items deleted in either the Briefcase or the main original folder, the Briefcase can create a copy of the missing item. Users can also sync individual items in the Briefcase by selecting the item first and then clicking the Update button instead of Update All. To enable this feature in Windows 10, follow the given steps.
Step to Enable Briefcase Feature in Windows 10
- Download this registry file from here.
- Double click on the downloaded registry file, and select “Yes” to grant it permission.
- Now another dialog box will appear giving a warning message. You can ignore it and click on “Yes”.
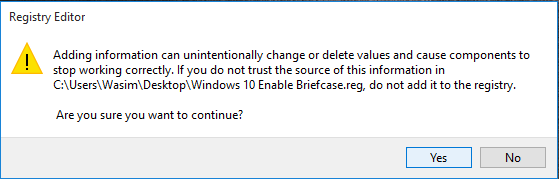
Warning Message - Now another dialog box will appear saying the the following message.

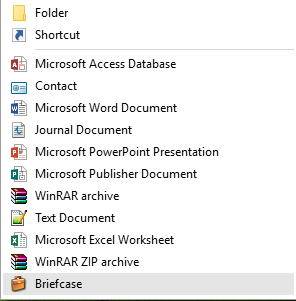
- That’s it. Now refresh 2-3 times and right click any anywhere on desktop and select new. You will see the Briefcase option.
After 
Before
Step to Disable Briefcase Feature in Windows 10
- Download this registry from here.

- Follow the same instruction from 2-5 given above.
This method should be working on windows 8 and 8.1 also. If you face any issue then describe it in comment section so that we can help you out. 😀


Windows 8.1 Please
No longer works as of creator update. used to work in older versions of windows 10
source: https://www.howtogeek.com/396628/what-was-the-windows-briefcase-used-for-anyway/
not working for me on windows 10 1909
not working for me also window 10 1909
no longer available on google drive link at here
I just tried on my desktop to get Briefcase feature back and when I clicked “here” response was this file does not exist. Any other door I can use?
Did every step…worked on my pc but not on my laptop. re did the steps four times..
i even removed and replaced the file again
sae here… can anyone help. briefcase not working on my lappie
they removed it completely like 4 years ago
This fix to enable briefcase in W10 worked great until just today after installing the Windows 10 update. All my briefcases were changed to regular file folders. I tried the procedure again today with no luck.
its ……. gone , every thing has a end ……… its gone
[…] own OneDrive have largely replaced the older program. (Dedicated hobbyists have posted searchable instructions for restoring Briefcase to Windows 10 by editing the Registry, but you tinker at your own […]
[…] own OneDrive have largely replaced the older program. (Dedicated hobbyists have posted searchable instructions for restoring Briefcase to Windows 10 by editing the Registry, but you tinker at your own […]
[…] own OneDrive have largely replaced the older program. (Dedicated hobbyists have posted searchable instructions for restoring Briefcase to Windows 10 by editing the Registry, but you tinker at your own […]
[…] own OneDrive have largely replace the older program. (Dedicate hobbyists have poste searchable instructions for restoring Briefcase to Windows ten by editing the Registry, but you tinker at your own […]
[…] own OneDrive have largely replace the older program. (Dedicate hobbyists have poste searchable instructions for restoring Briefcase to Windows ten by editing the Registry, but you tinker at your own […]
[…] own OneDrive have largely replaced the older program. (Dedicated hobbyists have posted searchable instructions for restoring Briefcase to Windows 10 by editing the Registry, but you tinker at your own […]
Doesn’t work just upgraded to 10 from 7 and no matter how many time I run reg file, nothing happens.
Version: 10.0.15063 Build 15063
Win 10 Pro
Excellent!!
It works perfectly.
Thanks….
when create the briefcase on google drive not working
This works fine to be able to create a briefcase, and to put things into it. However, just like on Windows 8/8.1 I can not pull a file out to “make a sync copy” on another machine (or on this machine if it was created elsewhere. This didn’t really work that well on Windows 7 for me either. On windows XP everything was fine. Anyone have a clue how to get the briefcase database updated with sync locations.
Thank you worked perfect!
🙂
Thank you. it works for me perfectly
Odd, have been migrated onto Insider Preview 14379.rs1_release160627-1607 and all seems OK now!!
Good to hear that 🙂 🙂
BTW, I’m currently on Insider Preview 14372.rs1_release160620-2342 if it’s relevant.
I’ve run the “enable” reg update and created a briefcase folder. Unfortunately, I can’t copy any files into it, it appears to be write protected, if I un-set the Read-only attribute I still can’t write into the folder and the attribute has rest to on!
Any ideas?
Enable Briefcase.reg is mp3 file format. Are you sure?
Google Drive is messing this up. Please remove the .mp3 from the file’s extension and then run it as explained.
No need at all. Just right click on your Briefcase icon, then click “Update all”. The Briefcase works just like used to be.