
Airtel is the market leader in the broadband internet service space. Airtel utilizes routers (GPON/ONU + router) from various brands, which vary depending on the location and commercial arrangements. So, you may have a Nokia router, or a ZTE, Binatone, Huawei, or an unbranded one. One thing that all of them have in common is that they are locked, leaving only a handful of user-customizable settings in the admin panel. Apart from the basic configuration changes, the network connection settings and other advanced settings are locked.
Among the locked settings is the option for bridge mode. Bridging mode allows you to convert your Airtel-provided router into a simple ONT, thereby bypassing its routing functions. Then you can connect a different router to the LAN port and set up a PPPoE connection. Or you can connect it directly to your PC’s Ethernet port.
Advantages of using Bridge mode
Although you can create a similar situation by disabling DHCP on either the Airtel router or your secondary router, there are several advantages to connecting the routers in a bridge mode. Depending on your router’s firmware version, DHCP control may also be disabled.
The primary advantage of using bridging is that it avoids a double-NAT situation. Additionally, if you’re using a good router, your connection quality, signal range, wall penetration, and overall connection reliability will also improve.
You can also utilize advanced features like built-in VPN, traffic monitoring, custom SSID (Airtel now forces the Airtel name in the SSIDs), guest network, and AdBlock DNS, in addition to fully owning and customizing your Wi-Fi network to your liking. The Airtel router will function as a dumb ONT, converting your optical fiber line (SC/APC) into an RJ-45 port suitable for your router’s WAN port.
How to Enable Bridging on the Airtel Router?
As the router is locked, the process to enable bridge mode is to be handled by the Airtel backend (NOC team). Here is the process flow.
- Call Airtel customer care at 121 or 9810012345 and connect to a customer care associate.
- Request for enabling bridge mode.
- Make your way through the routine set of excuses that Airtel staff will use to deny bridging for your device, such as:
- Bridging is not available
- Airtel router provides the best configuration
- Static IP is required
- Thereafter, an Airtel customer care associate will create a service request for you and assign an engineer.
- Communicate with the engineer who visits your place. He will then raise the request with the local NOC (Network Operations Center) team and have bridging enabled for your router.
- Connect an Ethernet cable to the LAN port that’s enabled for bridging (typically LAN 4) and set up a PPPoE connection in the WiFi router or directly in the computer.
I followed the steps above to enable bridge mode on my ZTE F670L router, which was provided by Airtel. The process for other brand routers should be the same. However, depending on your local area, router, and the assigned engineer, it might become a very difficult task to achieve.
How to convince Airtel customer care and the engineer to create a service request for bridging mode
Upon initially requesting bridging, the customer care staff will attempt to convince you not to enable bridging mode. They will tell you how their router is good and is the best option for connection quality and stability. After the initial denial, they will try to upsell Static IP.
Static IP: Airtel CS will claim that a static IP is required in order to enable bridging. If you decline, they’ll claim that your internet will not work or will no longer be stable. They will inform you that your connection will be disconnected every 24 hours, and your IP address will be reassigned upon such a disconnect. Depending on the agent handling your call, they may also make other unusual excuses.
You need to be upfront and adamant about your requirement. Inform them that you don’t require a static IP, and that not having one will not impact connection stability. It will stay the way it is right now. The PPPoE connection session also closes every day, but the router immediately creates a new connection. This is exactly how it happens in Airtel’s own router as well.
Once they realize they cannot convince you of other options, they’ll proceed to create a service request. Although the entire process is backend-related and no technician visit is required, the first level of Airtel CS doesn’t have the know-how or the access to make such a modification for you. A technician or service engineer will be assigned to your case, and you will then need to work with the engineer at the local level.
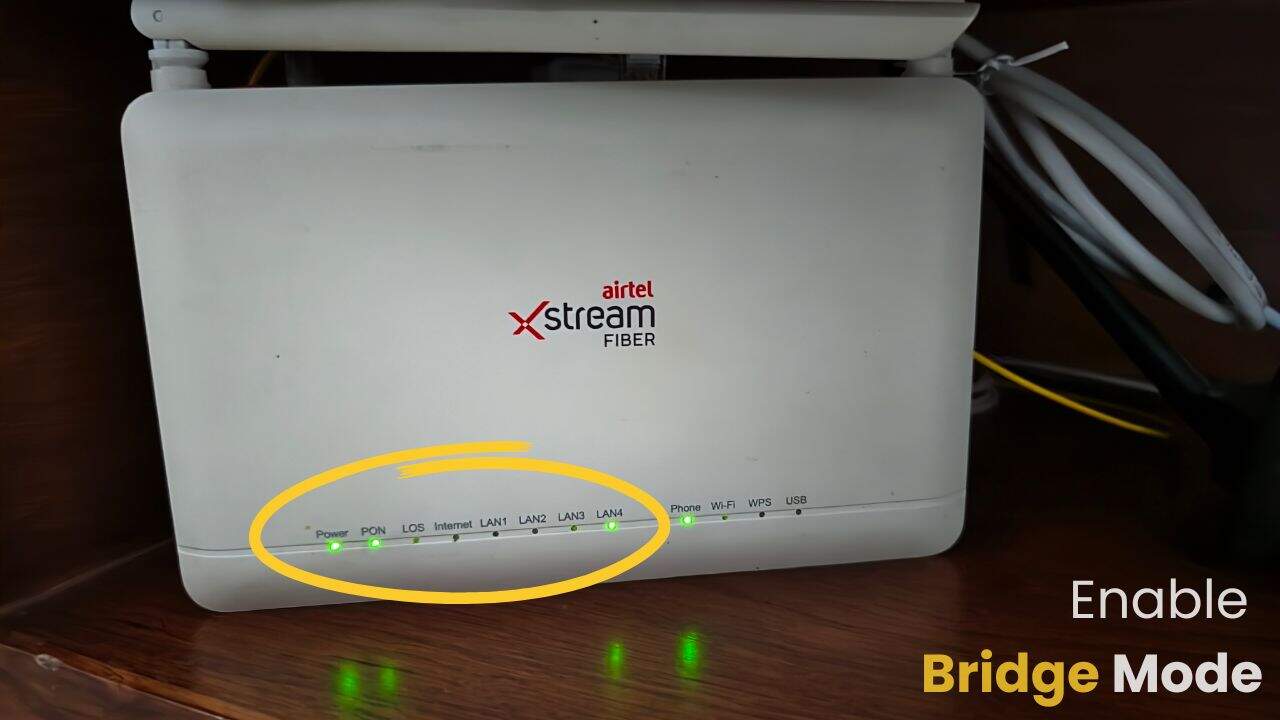
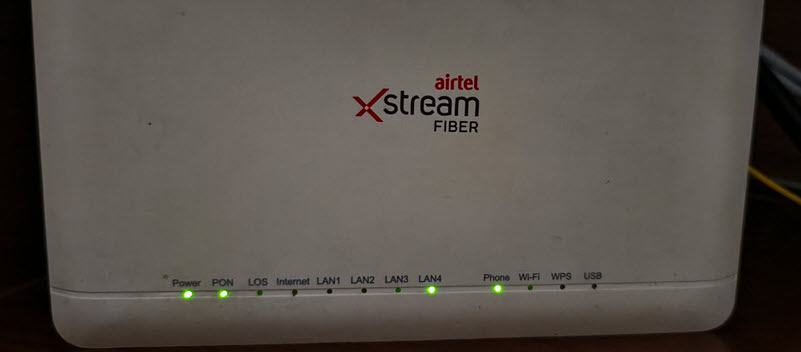
If the engineer is experienced, they will understand your request and contact the NOC staff to enable bridging mode on your router. It might take one or two attempts and a few minutes thereafter for the changes to take effect. Once provisioned, most of the indicator lights on the Airtel router will go off.
At this point, you can connect the LAN cable to the LAN port enabled for bridging (typically LAN4). Then, create the PPPoE connection through another router or PC and start using the internet. There is no need to clone the MAC address or any other properties.
The config is set up and transferred to your router through the TR-069 profile. So, you or the Airtel technician doesn’t need to make any manual changes in the Airtel router’s admin panel.
If you need the PPPoE credentials, then refer to this post –
Best alternative to bridge mode on Airtel Xstream router
If you want to use your own router but Airtel is not very helpful in enabling bridge mode, then there are some alternative options that you can choose from:
1. Disable WLAN (Wi-Fi) on the Airtel router
You can disable Wi-Fi (WLAN) on your Airtel Xstream router and then connect your own router to the LAN port on the Airtel router. This way, you can set up all the connection parameters on your own router and use its Wi-Fi network for your devices.
The downside of this approach is that the Double-NAT situation will arise, and all traffic will flow from your router to Airtel’s router before reaching the internet. You will see that hope if you make a traceroute. Here’s a screenshot of such a traceroute.
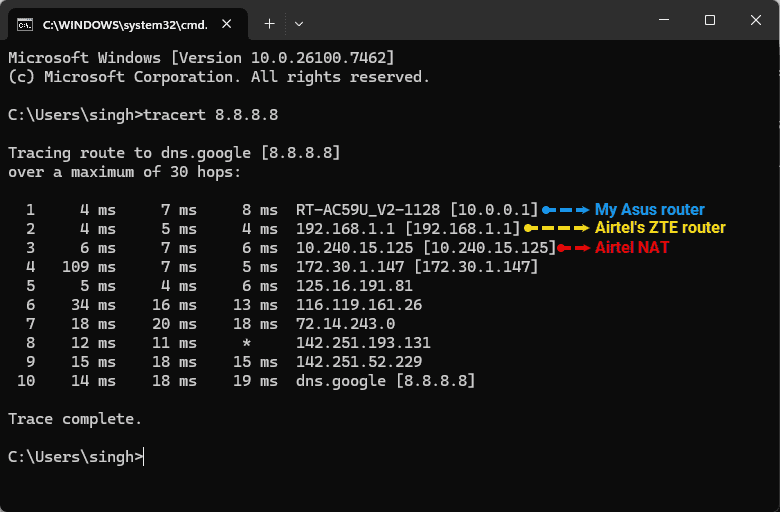
You will see how the traffic flows from my PC to the Asus router, then to Airtel’s ZTE router, and finally reaches their NOC and the internet.
2. Use your own Fiber ONT (GPON/XPON)
The second option is to replace the Airtel-provided ONT router with your own. However, this is a complicated setup, and you must be an advanced user to take this route.
In this process, you will connect the Fiber cable from Airtel directly to your own ONT (modem-only or router) and then set up the PPPoE connection.
Remember that you will need to clone the GPON serial number of Airtel’s router to your own ONT. Therefore, only purchase an ONT modem/router that allows cloning of the GPON serial number. Otherwise, the connection will not be successful.
Since there is not a huge demand for GPON modems and routers among consumers, there are only a handful of good router options available to support such a setup. The GPON modem is a part of the ISP hardware in most home internet connections.
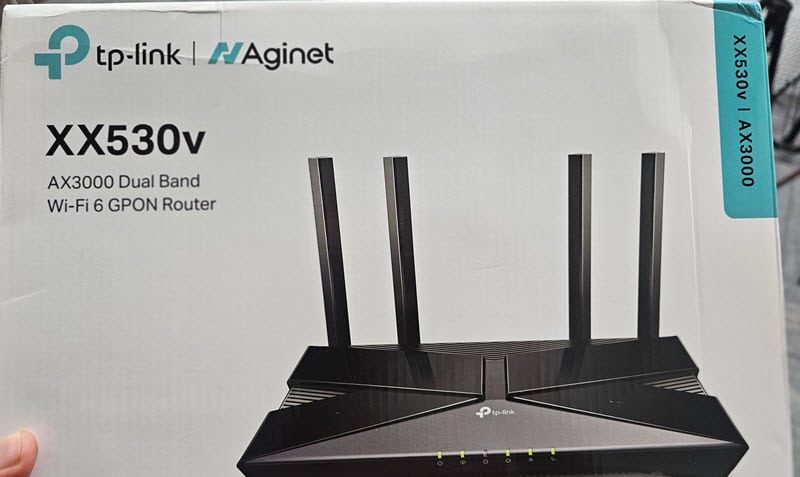
I will write another post about setting up a TP-Link XX530v GPON router with an Airtel Xstream connection. If you’re in the market for a new router, I recommend spending a little extra and opting for a GPON router instead of a regular router, as it can utilize both WAN and Fiber PON as sources of connection.


Add Comment