For some reason Microsoft decided to remove the option to turn Automatic Updates On of Off in Windows 10. Hence, Windows 10 will start downloading the updates on any connection as long as it is not marked Metered. Whilst its good for a lot of the users who have speedy connections, the ones with slow broadband connections suffer because Windows Update takes most out of the little speed that their connection offers. This results in slow browsing and even slower downloads. So here’s how to turn off Automatic Updates in Windows 10 and save some bandwidth.
Contents
Stopping Windows 10 from Updating Automatically
There are two alternative ways to turn off the Windows update. One where the updates are only stopped from automatically downloading and the other where they are entirely disabled and a manual check won’t work either. First one is preferred.
Method 1 – Disable Automatic Downloading of Windows Updates
Just a note, while you can follow the steps below to disable Windows Update, be sure to still run it manually once in a while (when PC is idle) and let the PC update. That’s because a lot of updates are important to keep Windows stable and running. Windows Update also brings security fixes and driver updates which can improve hardware compatibility.
- Type gpedit.msc in Start and press Enter key to open the Group Policy Editor. Alternatively, press + R, type gpedit.msc and hit Enter.
- In the left pane, navigate to: Computer Configuration> Administrative Template> Windows Components> Windows Update.
- Now in the right pane, double-click on Configure Automatic Updates.
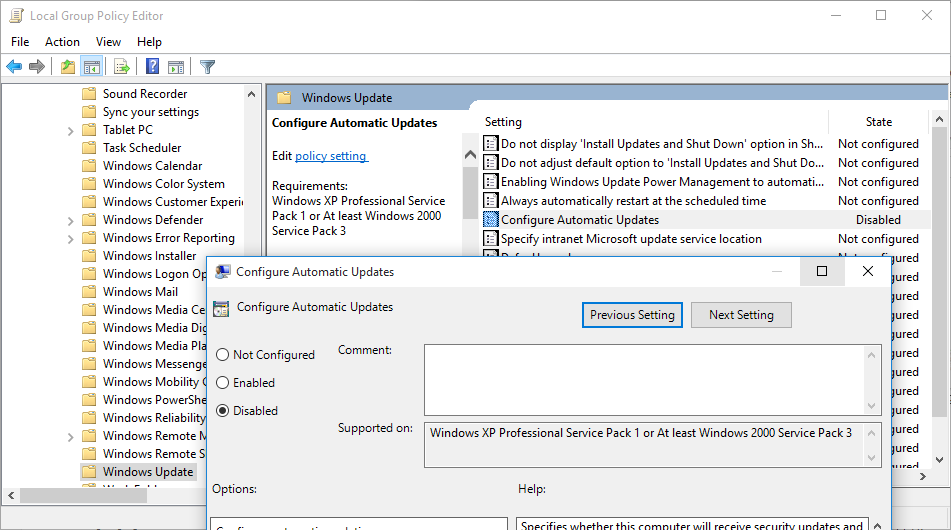
Set to Disabled - Change the value from Not configured to Disabled and press OK.
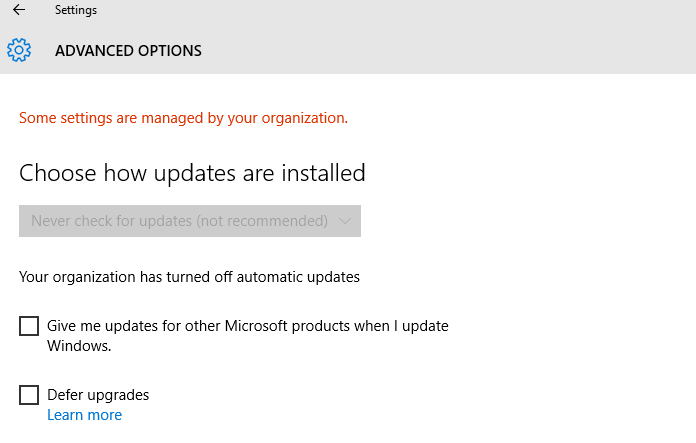
From then onward, Windows will not automatically check for and download updates. The same will be reflected by a note on the Advanced settings page under Windows update settings.
Method 2: Disable both Automatic & Manual Updates
This method disables Windows Update entirely and you need to follow the steps mentioned in 2.1 below to make it work again.
- Open Run by pressing Windows Key + R. Alternatively, you can also right-click Start button and choose Run.
- Enter services.msc and hit Enter.
- In the Services window, locate service with the name Windows Update.
- Right click on Windows Update and choose Properties.
- Firstly stop the service by clicking the Stop button. Then change Startup type from Manual to Disabled.
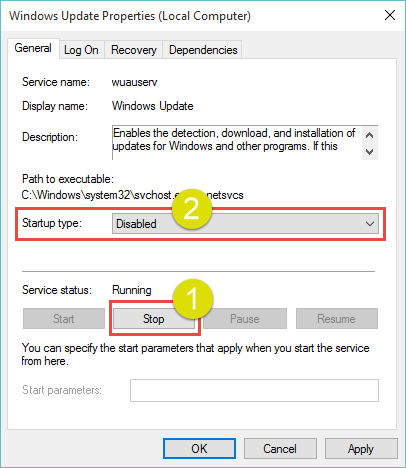
- Click OK and you’re good to go. Windows will try to check for updates, but because the service is not running, it will go into an error state.
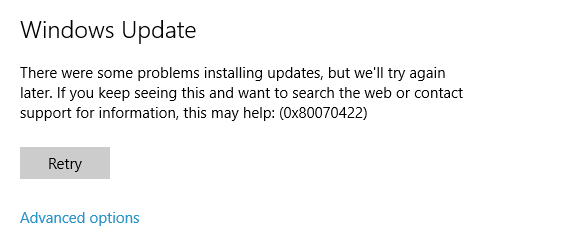
Error checking for Updates
2.1 Enabling Windows Updates Again
Because updates are important, you should turn on updates from time to time and update your PC to the latest. To turn Windows Update on:
- Follow steps 1 to 4 in the above procedure.
- Change Startup type from Disabled to Manual.
- Click OK.
- Go to Windows Update in PC Settings and press on Check for Updates and Windows will start installing updates.