
Windows 10 has changed the way certain features are assessed and customized, one such being the desktop icons. Desktop icons were easily customizable in Windows 8.1 and below using the personalize window, but in Windows 10 the feature has been shifted to the settings app and for some, it will be a tedious task to locate the option.
This PC icon lets users access the computer’s storage devices besides other things. Whilst a shortcut to This PC can be easily sent to the desktop, adding the original icon takes a bit of effort. Adding original system icon is different in the sense that when sorting icons by type, they will not mix up with other shortcuts on desktop.
Choose Which System Icons Appear on Desktop
Follow the steps below to add/remove This PC/Computer, Recycle Bin, User’s Files, Control Panel and Network icons to Windows 10 desktop.
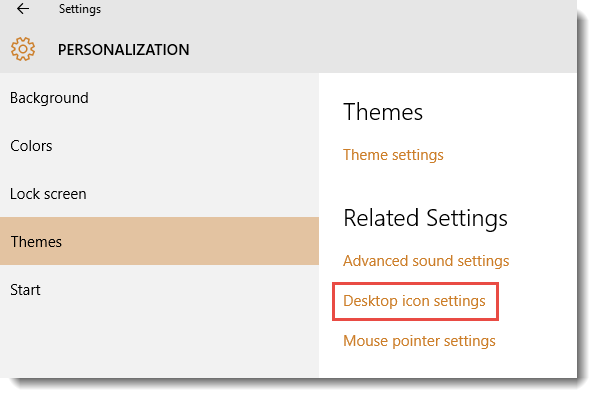
- Right click (or tap and hold) on Desktop and choose Personalize.
- Select Themes from the left sidebar.
- Click/tap Desktop icon settings.
- Check the system icons which you want on your desktop and uncheck the ones not needed. To add This PC, check Computer.
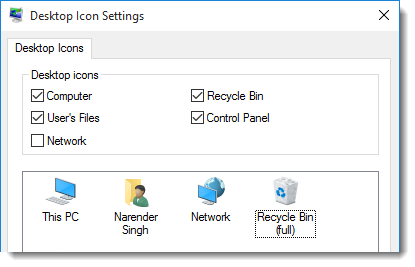
- Click OK.
The selected icons will then appear on your desktop and you can then sort them whatever way you may like.


Thank you very much.